Post by cien on Aug 17, 2005 2:42:08 GMT -5
Well hello there! I notice some folks here seem to like my tutorials and I remember MahuD posting in my shoutbox. So I thought I'd share an exclusive tutorial (for the time being anyway) with all of you.
For Paint Shop Pro 9
I call this tutorial an Obsidian Sig. It's like a grunge sig, but with no brushing required. Let's start, shall we.

Before you begin, you may want to have a render ready to go. You can get them at www.render-world.com/ or www.clantemplates.com/

1. Create a new 360x120 image with the Pattern “Paper” as the Background.

2. Duplicate the layer.
Go to Effects | Edge Effects | Find All. Set the layer to Multiply. Merge Down the layer (Layers | Merge | Merge Down)

3. Duplicate the layer.
Go to Effect | Artistic Effects | Glowing Edges. Use the Default settings. Change the Layer Blend Mode to Lighten.
Duplicate the layer.
Change the Layer Blend Mode to Soft Light with an opacity of 50. Merge All the layers (Flatten)

4. Press Shift+L to Colorize. Set the Hue and Saturation to 0.
Go to Effects | Illumination | Lights… Load the Soft Light (top) preset, then change these settings.
Color = White
Intensity = 60
Vertical = -100
Cone Size = 89
(At this point, you may want to use Effects | Reflection Effects| Rotating Mirror… to change the pattern. Hit Randomize until something
desirable comes up . This step is completely optional, though.)

5. Now it’s time to paste your render.
Create a New layer. Copy your render by having a selection around it. Press Ctrl+E to Paste as a New Selection, then Ctrl+Shift+F to Defloat it.

6. Now we will blend the render.
Your selection should still be active. Press Ctrl+H to Feather the selection by 25. Press Ctrl+Shift+I to Invert the selection. Hit delete once. Press Ctrl+D to Select None.
Change the Layer Blend Mode to Luminance (Legacy). Duplicate the layer. Change the Layer Blend Mode to Dodge with an opacity of 50. Merge All the layers (Flatten)

7. Go to Adjust | Color Balance | Color Balance… and change the color to your liking. When you have a shade of color you like, Duplicate the layer. Go to Adjust | Softness | Soft Focus… and use the Default settings. Finally set the Layer Blend Mode to Multiply, Screen or Overlay.
That’s it. Feel free to add typography and a border to complete the look.
For Paint Shop Pro 9
I call this tutorial an Obsidian Sig. It's like a grunge sig, but with no brushing required. Let's start, shall we.


Before you begin, you may want to have a render ready to go. You can get them at www.render-world.com/ or www.clantemplates.com/

1. Create a new 360x120 image with the Pattern “Paper” as the Background.

2. Duplicate the layer.
Go to Effects | Edge Effects | Find All. Set the layer to Multiply. Merge Down the layer (Layers | Merge | Merge Down)

3. Duplicate the layer.
Go to Effect | Artistic Effects | Glowing Edges. Use the Default settings. Change the Layer Blend Mode to Lighten.
Duplicate the layer.
Change the Layer Blend Mode to Soft Light with an opacity of 50. Merge All the layers (Flatten)

4. Press Shift+L to Colorize. Set the Hue and Saturation to 0.
Go to Effects | Illumination | Lights… Load the Soft Light (top) preset, then change these settings.
Color = White
Intensity = 60
Vertical = -100
Cone Size = 89
(At this point, you may want to use Effects | Reflection Effects| Rotating Mirror… to change the pattern. Hit Randomize until something
desirable comes up . This step is completely optional, though.)

5. Now it’s time to paste your render.
Create a New layer. Copy your render by having a selection around it. Press Ctrl+E to Paste as a New Selection, then Ctrl+Shift+F to Defloat it.

6. Now we will blend the render.
Your selection should still be active. Press Ctrl+H to Feather the selection by 25. Press Ctrl+Shift+I to Invert the selection. Hit delete once. Press Ctrl+D to Select None.
Change the Layer Blend Mode to Luminance (Legacy). Duplicate the layer. Change the Layer Blend Mode to Dodge with an opacity of 50. Merge All the layers (Flatten)

7. Go to Adjust | Color Balance | Color Balance… and change the color to your liking. When you have a shade of color you like, Duplicate the layer. Go to Adjust | Softness | Soft Focus… and use the Default settings. Finally set the Layer Blend Mode to Multiply, Screen or Overlay.
That’s it. Feel free to add typography and a border to complete the look.


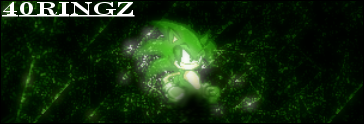
 heres what i made from that.... nice tut dude!


