
Post by matthew on Jan 30, 2006 5:34:54 GMT -5
Create a new image 40 X 40 pixels. (File > New. or Ctrl + N)
In the tools palette, select the floodfill tool, and fil the background with your chosen colour. i'm using #621919
Magnify the image to 800%
In the tools palette, select the selection Tool. Selection type: circle.
Select info on the Overview Palette
And make a circle (34 X 34) starting at the center of the image (X:20 Y:20).

Save the selection to alpha channel (Selections > Load/save Selection > Save Selection to alpha Channel)
Create a new Layer (Layers > New Raster Layer)
With the background colour still set in your foreground material properties box, open up the material Properties dialogue and click just above the circle marking the selected colour in the Saturation/lightness box. Press ok. Then open up the Background material properties box, click on the background of your image to select the colour, and Click just below the circle marking the selected colour in the Saturation/lightness box. Press ok. Bit difficult to explain all that, so check out the picture below to get a better idea ;D

In your foreground material properties box, open up the material properties dialogue and select gradients. set the forground-backgound to your materials box with these settings
Style: Linear
Angle: 0
Repeats: 0
Invert: checked
Select the Flood Fill tool and fill the selection on the raster2 layer
select none (Selections > Select none) or Ctrl+D
Go to Effects > Blur > Average filter aperture: 3. press ok.

Go to layers > new Raster Layers
Then go to Selections > Load/save Selection > Load Selection from alpha Channel
Then go to Selections > modify > Contract: 4 pixels. press ok.
And that's the base of the old/new icons complete.
Now we are going to create the orb. first create a gradient. I'm using #987624 as my foreground and stroke colour, and #ebdab1 as my background and fill colour.
Set the Forground-background gradient to your foreground and stroke properties box with these settings
Style: Linear
Angle: 0
Repeats: 0
Invert: checked
And flood fill the selection
select none (Selections > Select none) or Ctrl+D
Go to Effects > Blur > Average filter aperture: 3. press ok.

Go to layers > new Raster Layers
select the selection Tool. Selection type: Elipse.
make a 18 X 20 selection starting with X:20 Y:18 as your cursor posision (see the Overview Palette on info)
Click on the foreground and stroke properties box and select the Fading White Gradient with these settings
Style: Linear
Angle: 0
Repeats: 0
Invert: unchecked
and flood fill the selection
select none (Selections > Select none) or Ctrl+D
Go to Effects > Blur > Average filter aperture: 3. press ok.
(you might want to reduce the opacity of the Fading white gradient slightly. I have reduced mine to 90%)
On the layers palette click on the visibility toggle (the Eye Icon) for both Raster 1 and 2, so they are both crossed. click on Raster 4, and merge visible (Layers > Merge > Merge Visible)
To unhide Raster 1 and 2 Click again on the visibility toggles
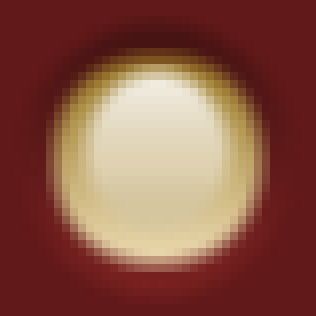
That's my New Icon complete, and now to make an old icon, duplicate the Merged Layer (Layers > Duplicate), and click on the invisibility toggle to hide The Merged Layer
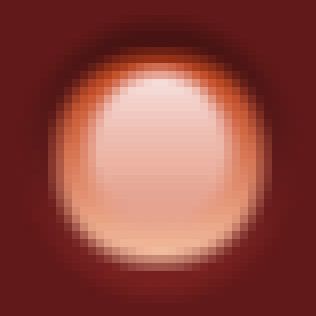
Click on the Copy of Merged Layer and go to Adjust > Colour Balance > Colour Balance and make these settings
Colour Levels: 65 -100 -50 and press ok
and that's it

In the tools palette, select the floodfill tool, and fil the background with your chosen colour. i'm using #621919
Magnify the image to 800%
In the tools palette, select the selection Tool. Selection type: circle.
Select info on the Overview Palette
And make a circle (34 X 34) starting at the center of the image (X:20 Y:20).
Save the selection to alpha channel (Selections > Load/save Selection > Save Selection to alpha Channel)
Create a new Layer (Layers > New Raster Layer)
With the background colour still set in your foreground material properties box, open up the material Properties dialogue and click just above the circle marking the selected colour in the Saturation/lightness box. Press ok. Then open up the Background material properties box, click on the background of your image to select the colour, and Click just below the circle marking the selected colour in the Saturation/lightness box. Press ok. Bit difficult to explain all that, so check out the picture below to get a better idea ;D
In your foreground material properties box, open up the material properties dialogue and select gradients. set the forground-backgound to your materials box with these settings
Style: Linear
Angle: 0
Repeats: 0
Invert: checked
Select the Flood Fill tool and fill the selection on the raster2 layer
select none (Selections > Select none) or Ctrl+D
Go to Effects > Blur > Average filter aperture: 3. press ok.
Go to layers > new Raster Layers
Then go to Selections > Load/save Selection > Load Selection from alpha Channel
Then go to Selections > modify > Contract: 4 pixels. press ok.
And that's the base of the old/new icons complete.
Now we are going to create the orb. first create a gradient. I'm using #987624 as my foreground and stroke colour, and #ebdab1 as my background and fill colour.
Set the Forground-background gradient to your foreground and stroke properties box with these settings
Style: Linear
Angle: 0
Repeats: 0
Invert: checked
And flood fill the selection
select none (Selections > Select none) or Ctrl+D
Go to Effects > Blur > Average filter aperture: 3. press ok.
Go to layers > new Raster Layers
select the selection Tool. Selection type: Elipse.
make a 18 X 20 selection starting with X:20 Y:18 as your cursor posision (see the Overview Palette on info)
Click on the foreground and stroke properties box and select the Fading White Gradient with these settings
Style: Linear
Angle: 0
Repeats: 0
Invert: unchecked
and flood fill the selection
select none (Selections > Select none) or Ctrl+D
Go to Effects > Blur > Average filter aperture: 3. press ok.
(you might want to reduce the opacity of the Fading white gradient slightly. I have reduced mine to 90%)
On the layers palette click on the visibility toggle (the Eye Icon) for both Raster 1 and 2, so they are both crossed. click on Raster 4, and merge visible (Layers > Merge > Merge Visible)
To unhide Raster 1 and 2 Click again on the visibility toggles
That's my New Icon complete, and now to make an old icon, duplicate the Merged Layer (Layers > Duplicate), and click on the invisibility toggle to hide The Merged Layer
Click on the Copy of Merged Layer and go to Adjust > Colour Balance > Colour Balance and make these settings
Colour Levels: 65 -100 -50 and press ok
and that's it


